Scrapbook Studio - The Desk - Part 3

Desk-Top.jpg

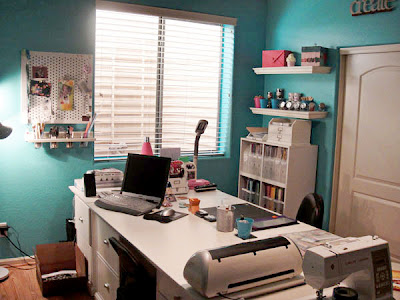
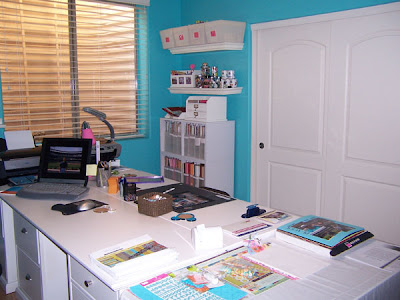
Welcome to Part 3 - The Desk and What is at My Fingertips (my most used tools).  Today I will be sharing the details of how my desk is organized. After each major work session, I like to put my desk back in order to look like this.  If I don't I have trouble starting something new.  There are plenty of times it is in disarray when I am mid-project. But when I finish up everything goes back to it's place and I start on my next round of destruction.

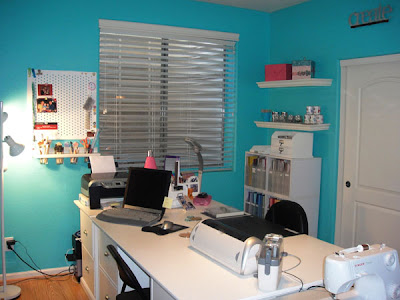
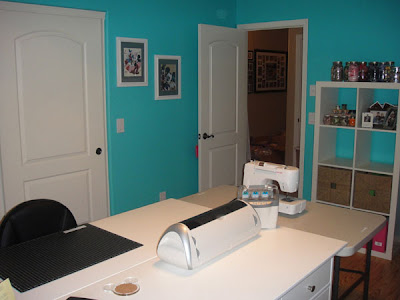
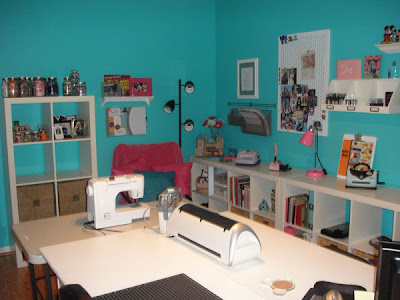
This is the busiest part of the room.  The work table...the hub...where all things come in and wait for a home.  I have my older desk top computer on the left side of the desk, I keep my Cricut Expression turned to the side so I have room to paint, mist or let things dry.  When I need to use the Cricut, I can just turn it a bit so the mat can run through the back. At my main work station I have a large self healing mat.  It was made by Making Memories and has 1" marks across, so it works great for lining up elements on a layout.  I keep a large space open to my side for the current scrapbook kit (the one on my desk here is from Studio Calico).  

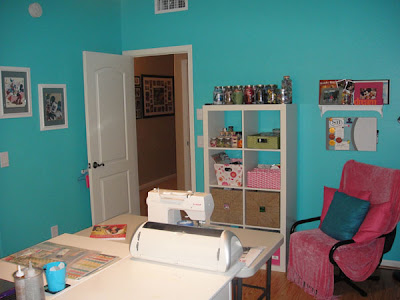
I have recently set up my sewing machine at one end of my work table.   It is plugged in and threaded for a quick stitch on a layout.  This table also is the hub for all new items.  Things are usually placed here until I sort them to put away.   I like to leave a new magazine or idea book out for a quick inspiration, when I am working.  I recently picked up Elizabeth Kartchner's book 52 More Scrapbooking Challenges with a coupon from CK Club Scrap. It is a fun book to flip through for inspiration.

I found that I was always needing liquid adhesive. So I keep my 3 favorites in this desk holder from an office supply store.  I am constantly using Fabritac for fabric and some ribbons on my layouts.  I like Tacky Glue for all kinds of all purpose things, and Beacon's 3 in 1 Craft Glue is like scrapbooking super glue.  If you want it attached to your chipboard and don't want to mess with something like Modge Podge, this glue is for you.  I keep pins in the top so they don't clog and they are always within reach. I also started using that little bucket (from the Target dollar spot) to throw all kinds of left over bits and baubles.  There are random snips of ribbon, buttons, brads, bling, pins, clips in there.  Whenever a package only has one or two things left I toss it in.  Then when I am working on a page that just needs one little bit of something I can usually find it here.

This is the Tool Center.  All of my frequently used tools are here.  The caddy on the right is from Pottery Barn.  Making Memories also makes a similar styled version.  It holds my black and brown journaling pens, pencils, regular pens, colored pencils, gel pens, glue pens,  baby wipes, paper trimmer, an extra self healing mat, brayer and more.  It has 3 picture holders in front, too, perfect for a craft room. The Making Memories desktop carousel holds so many goodies - scissors, adhesive guns, rulers, tweezers, sandpaper, edge distressers, stapler, glue and pop dots, Crop A Dile, Corner Chomper, craft knifes, bone folders, rub on tools, paper piecer's, files....you name it.  If it is small it probably can be found in here.  The drawers also hold, small little tools as well.  Michaels still carries these, and I have seen them on a few of the scrap deal web sites from time to time.

In this pencil box (Walgreen's for a $1 or $2) I keep all of my Cat's Eye chalk inks. I love these for distressing edges in different colors and this fits a lot of these little ink pads.  It works great for going to a crop too, because I can throw this in my tote bag, and my stamping and inking options are plentiful. On one side of  each desk of I have 2 small drawers about 3-4 inches high and 5 large file size drawers. On the main side where I work I have my lesser used adhesives in the top drawer.

I found this divider at Michaels and used it to fit all kinds of random supplies and additional types of adhesive, staplesm tape, glue sticks, extra trimmer cartridges, etc.

The other side of the desk with these drawers has office supplies in it. The larger drawers are used for some of my kit storage.  I still would like to re-do the kit storage.  Which I will get into in a later post.

2 other drawers have file folders in them to sort alphabet stickers (that are not Thickers) and rub-on's and stickers and look similar to this.

I also have a drawer for regular files, that includes things like handouts from classes I have taken. Another for computer software and DVD's burned with pictures and videos.  A drawer that holds printer and photo paper and ink cartridges for my printer. Another that holds all sorts of cords and adapters for the cameras, printers, computers, scanners, IPod's etc.   I also have an empty drawer, that I am in the process of deciding a use for too.  It used to house my Thicker collection, but I have recently changed the way those are stored. Tomorrow I will start on the shelve storage. 

Love Long Weekends & My First ScrapTiffany Challenge

MichelleSelfPort.jpg

I took Friday off so we could have a nice long weekend, filled with family time and lots of cooking and grilling.  So I stayed up late Thursday night finishing up my first ScrapTiffany challenge.  This week's challenge is Self Portraits.  There are 18 ladies on the design team, so the DT reveal's are on Monday and Friday.  Mine is up today, so I can share it here.  I like to do pages like this a couple of times a year and it had been a while since my last one.

Making Me Happy Now

On Thursday this week I will be hosting Thrifty Thursday over on the ScrapTiffany blog, so make sure you check it out.

We started off Friday with a quick breakfast out at Mimi's and then headed to the new SeaLife Aquariam at Arizona Mills.  It was crowded but it didn't matter too much.  Nicholas had fun and even touched some starfish.  We got an annual pass so we could go back several times.  If you live locally, it is probably the better way to go.  It is kind of pricey to just go for the day. It only takes about an hour to walk through one time.

We had lunch at Rainforest Cafe then headed back home for the afternoon.  I finished up The Short Life of Bree Tanner, (the Twilight novella) that afternoon.  Mike's been doing all the cooking lately, so it was my turn.

I took this....

And made this....Smoked Salmon Pasta,Tomato Bread Salad and garlic cheese bread.

The salad is definitely going to be a repeat recipe.  The salmon pasta on the other hand was just okay.  Just as I was about done making dinner, we heard a horrible noise coming from one of the A/C units.  So we had to shut it down and got to sleep in a warm room (thank goodness for ceiling fans and more than one air unit, or it would have been the couch again).

On Saturday Mike made us pancakes for breakfast.  Nicholas and I went to see Toy Story 3.  He fell asleep half way through and I cried like a baby at the end.  On the way home from the movies Mike called with the news that the compressor had gone out on the A/C, at the price tag of $2K.  So we are now up to $4K in the past month in A/C repairs. If it would have all blown out at once we could have replaced the unit for $5K.  So hopefully the A/C gods will be nice to us the rest of this summer and we can budget to start replacing our units next year.  You would think you shouldn't have to replace your A/C units after only 5 years, but I have concluded that Carrier stinks (and that is the G rated version).

Mike grilled us steak, asparagus and pineapple for dinner Saturday night and I conked out early that night after starting a new book.

The 4th for us was spent at home making breakfast, swimming, making cheesecake, grilling hot dogs and potatoes and playing outside in the evening.

I also kicked off my new scrapbook organization blog - Michelle's Scrapbook Studio.  I am starting off with a tour of my room and features on how I organize my stuff.  After that I plan to feature organization tips for organizing our creative spaces.

After a quick bath for the boys, we finished up our 4th by watching the fireworks from a nearby park (Tumbleweed) out on the greenbelt across the street from our house. It was great to avoid the crowds. It was a quick walk home afterwards, which was a good thing, since Nicholas fell asleep during the fireworks and I had to carry him home to bed.  Mike and I had the chocolate chip cheesecake I made for dessert and again I crashed pretty early.

This ended up being the best fireworks shot.

Of course at the end when I was trying to get a good picture of the finale two cars parked down the street from us to watch too, and left their headlights on facing us.  Thanks neighbors! :)-

Today we slept in, me after waking up at 3:30 a.m. and not going back to sleep until well after 5:00 a.m..  We had made a breakfast casserole last night, so breakfast was easy and we spent the rest of the morning in the pool.

This afternoon I was tackling scanning of a bunch of old photo's from my mom's boxes.  It's fun to look at so many of those old pictures. I think I spent the age of 3 with my mouth open, because I found several pictures where I looked like this.

Tonght Mike grilled steak tacos topped with his yummy Pico de Gallo (which ended up way too hot for me this time) served with a tomato, corn and avocado salad.


Now that I have to go back to work tomorrow, I wish I had one more day.

Scrapbook Studio - Around the Room - Part 2

2010-Update-July-2010-3.jpg
Hello!  Welcome to Part 2 of this 10 Part Series on where I create and how I keep it organized.  Today I am going to take you around the room to get you acquainted with the space as it is today.Entering the room the main work area is the main hub. This set up gives me the ability to scrap with 2 friends by just moving the sewing machine.  I recently moved the printer to the counter space to give me more space on the desk for tools and supplies I use all the time and to preserve maximum work space.  My main work area is on the right side of the desk, which maximizes my ability to see my different creative options, as well as reach behind me to the closet and paper storage.

The 2 main desks have wood tops over 2 bases with both sides extended to the window with an additional base with a half size table top.  This furniture design worked well when I decided to move the desks to the center of the room. I like the flexibility I have with this furniture.  I turned the end folding table into my permanent sewing station (not that I have started sewing regularly. I am still a bit intimidated, but eventually I will tackle that thing).

Pottery Barn has a line of desks called Bedford very similar to the ones I have, but I couldn't afford those.  After a lot of searching I found something very similar from my very favorite store, Target. They still carry the line it is called Coastline.  What I loved about both of these is that they are component pieces.  So I was able to select the pieces I needed to design the room the way I wanted.
I have seen the Pottery Barn desks in person and I am satisfied the quality of the Target desk is just is good.  The only real difference (other than price) is that the handles were different and the Pottery Barn brand had label holders on the drawers.  All of the Target pieces came put together, so we just had to unpack them from the boxes, set them in place, place the tops over the bases and install the handles.
Someday I think I may look at changing the desks to a a counter hight configuration. I think I may like that  better for creating, but I am more than happy to continue working in the space as it is.
Next, a closer look at the shelving and counter space on the left side of the room.

By moving the workspace in the middle I freed up the wall which is about 15 feet long.  I was able to fit 3 of the IKEA Expedit shelves.  I wanted counter space, for my frequently used tools, so I chose the 2 by 4 cube configurations and then utilized the wall space for vertical storage.
These shelving units are inexpensive, easy to assemble and a good size for various scrapbook and craft items.  There are several configurations possible and at least 4 finishes for most styles. They could be useful for many different scrapbook spaces, regardless of your room size.
Next, from the corner to the left of the door looking to the back of the room:

I do have a large window in this room, but the room is in the basement. I only get great natural light in the late morning hours.  I have incorporated overhead lighting in my ceiling fan as well as 2 floor lamps and an Ott Lite which can usually be found on sale at any of the big box craft stores.  I got mine several years ago during a 40% off sale.  That lamp is my lifesaver most hours of the day.

While I didn't get the desks from Pottery Barn I did splurge on a few desk/office pieces from the Bedford collection.  These were:
The 2 drawer paper organizer and paper tray (not available), both on top of the shelves holding paper (above picture).  On my desk I use the caddy with 2 long and 3 short vertical slots (seen in first picture).
I also bought a few other pieces from Pottery Barn that are not available any longer (at least not online), including the shelves to the right of the window, a wall mounted DVD holder (seen in the second picture above, over the counter space) and the wall mounted craft room organizer (below the white board to the left of the window).  I will talk about how I use these in later posts.
The closet and paper shelves are behind my main work area.  In this picture the door is to the right and window to the left.

Just giving you a peek in the closet here.  There are all kinds of storage ideas in there that I will share in a later post.

Next, looking back at the door.

One of the things I love about my room being in the basement, is that I don't always have to clean up mid project.  My kids are little and are not down in the basement unsupervised and rarely do visitors come down.  Also, the room is at the end of the hall, so even if someone were to come down we could shut the door and no one would know what kind of mess I have going on.
As I mentioned yesterday, I added an additional IKEA Expedit shelving unit in January. I am much happier with this configuration as it allows much better storage space options.  I upgraded my Cricut last year to the Expression, so I moved it to the desk to make it more accessible and usable.
Next,  looking back in the corner to the right of the doorway.
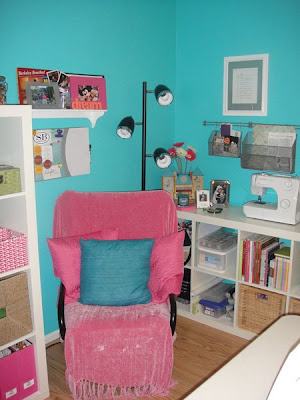
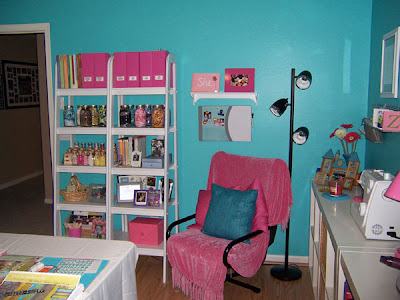
My "thinking" chair has been with me for about 20 years now.  I bought it at what was then called STOR, it was IKEA before we had ever heard of IKEA.  The chair is black but it looked out of place in the room, so I found a pink chenille blanket to cover it and some pillows. My dog, Marti loves to come sleep in that chair while I am creating.
The 2nd sewing machine is my "Target bargain basement" machine.  I figured I would keep that for sewing on my layouts and use the better machine for fabric.  Although, I have been using the better machine for both, so I may part ways with this one.

Tomorrow I hope you will join me for Part 3 - The Desk and What is at My Fingertips (most used tools). We will start getting into the details of how I use my space.

Scrapbook Studio - Evolution of a Scrapbook Studio - Part 1

2008-Re-Design-3.jpg

Welcome to my 10-part series on how my scrap room has transformed into where it is today.  Over the next 10 days, I am hoping to share some ideas on organizing all that stuff we accumulate when we start crafting so that you use the things that you have. I'll also talk about things I would like to still improve.  I think my room will always be a work in process, and that's okay with me.

Coming up over the next 10 days:
Part 1 - Evolution of a Scrapbook Studio
Part 2 - Around the Room - Where I am Now
Part 3 - The Desk and What is at My Fingertips (most used tools)
Part 4 - Using the IKEA Shelves Part 1 - Counterspace, and all those cubes
Part 5 - Using the IKEA Shelves Part 2 - Ribbons, and Buttons, and Flowers, Oh My!
Part 6 - Using the Wall Space to Store Tools and Supplies
Part 7 - The Closet - Storing Stamps, a Library of Memories Backbone Peek, Color Drawers, and Much More
Part 8 - Cricut, Paper, Sewing and Kit Storage
Part 9 - My Library of Memories
Part 10 - Purging - We've Got To Do It
Evolution of a Scrapbook Studio (Part 1):

To get an idea of where we are going, we should see where it all started.

I started scrapbooking in 2002.  We were pre-kids at the time and had a couple of empty bedrooms.  I took one of those spare bedrooms and set up a 6 foot folding table and started with a paper stack from Michaels and a few supplies that fit into a little 3 drawer organizer. Over the next 2 years I added a couple of bookcases and took over about 1/4 of a small closet.

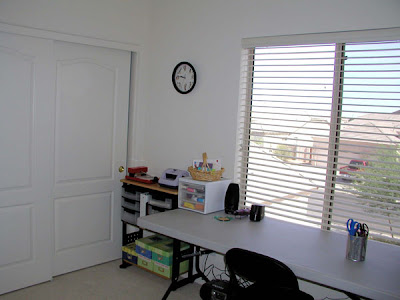
We moved out of that house in 2004, shortly before we moved the room looked like this....

So in about 2 short years, I was well on my way to accumulating lots of stuff...

In 2004 we started building a new home.  When we saw the model for the home I knew immediately which room I wanted for my scrap space.

It doesn't look like much here, but for the room was in the basement and the basement bedrooms were huge. This one had a large walk in closet.

We lived in an apartment temporarily while the new house was being built, and while a lot of our stuff was in storage, I moved my scrap stuff with me.  I kept on scrapping and accumulating in that little office we shared in that little apartment.

And then I waited, and waited, and waited...until finally at the end of April 2005 our home was done and I had my future dream room.

I had several additional electrical outlets added around the room and a ceiling fan pre-wire to add additional lighting.  If I knew then what I know today, I would have had more overhead lighting installed.  I have had to add a lot of lighting around the room to get enough light.  The downside of the basement is there is only one window and it only gets good late morning ligh. The rest of the day the natural light isn't the best.

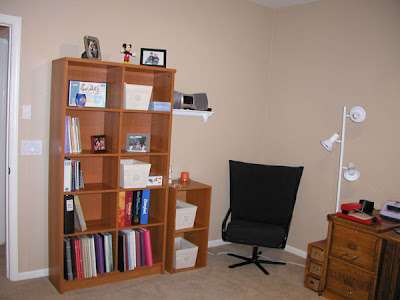
It took me a couple of months to get everything unpacked and set up in this room.  I was able to get these hand me down desks to have a computer desk and a scrap desk.

I had my "thinking" chair and lots of room.  I was very excited with the space...but the colors were uninspiring.  We also had just got puppies and I didn't trust them on the carpet at the time, but I wanted them down in the room with me while I was scrapping.

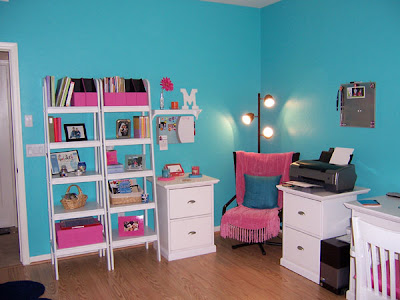
So after lots of planning and shopping for the best deals I could find, we transformed the room to this.
From the doorway

From the left of the window looking back

To the right of the window.

I didn't like having carpet in the room, it made me afraid to get messy.  So we ripped it out and put in laminate wood flooring.  I wanted happy bright colors and settled on this teal blue and accented the room with hot pink.

Since this major remodel I have updated the room every couple of years to where it is today.

In 2008 I decided I wanted my workspace in the middle of the room.  This made wall space available and I added the 3 IKEA Expedit shelves along the side wall and the Lisa and Becky wall system (that is no longer available).  This give me some counter space to work with for tools and machines. The little bookshelf that was in the corner was replaced in this update.  I also got rid of the white chairs, they were cute but not functional or comfortable and they didn't roll on the floor well.

From the doorway
From the opposite corner
Looking back at the doorway.
Then came 2010.  As cute as those shelves were next the chair in the picture above they just weren't very useful. I was limited on how I could use the shelves to store things.  So I replaced them with another IKEA Expedit shelving unit.
From the doorway
From the opposite corner looking in
Looking back towards the door
Looking back towards the corner opposite the door
I have made some more tweaks since January after we closed down our business (Color Me Daisy). I had to incorporate some more things into the room as we cleaned out the rest of our inventory and tools. Tomorrow you'll see the room the way it is today and some highlights of things to come.

Welcome to the Scrapbook Studio

DSC04915.jpg
Welcome to my Scrapbook Studio Blog.  Here I will share how I have set up my creative space and how I attempt to organize all my stuff.
Today
We have lived in our house since 2005 and my space has evolved over the years from mix and match leftovers, to my dream studio (always a work in process). On this blog I will share pictures of my space including how I have organized various scrapbook tools and supplies. I will also share tips and ideas I discover for organizing your creative space.

Halfway there....

062810-1.jpg

...to my 4 day weekend that is.  Work is busy this week.  Internal audit is visiting and our air conditioning went out (again) yesterday.  We had to sleep on the couch in the basement last night to keep cool.  Our bedroom was a stifling 85 degrees with the fan blowing full blast.  That doesn't make me happy, it makes me cranky...those poor auditors. :). Air was fixed today so back in my own bed and a comfy weekend at home is planned trying out some new recipes.  Saturday we made this Smoked Salmon Pizza it was so yummy....

Nicholas and Jackson are playing pretty well together now....well maybe too well.  On sunday, after several minutes of very loud noise and a closed bedroom door we walked into Jackson's room and found this....

Trouble with a big fat capital T, I tell you...
Also on Sunday, Mike pointed out I had not updated our family room banner.  It still said Spring from one I made a couple of months ago.  We were having the family over for dinner Sunday evening, so I had an hour or so and whipped this one out.  Not super fancy but I love the colors of the Echo Park Paper Sweet Summertime line.  Mixed with some Sassafras whimsies and banner stickers, a few Making Memories glitter stars, ribbon from Michaels, a few punches and Studio Calico Carter and Storytime alphabet stamps and Stamps of Life  stamps I whipped this up in no time. We now have a Summer banner....

Love Saturdays....

DSC04705.jpg

We got up a little after 5:00 this morning so Mike could do some cleaning up outside (you have to when it is going to be well over 100 degrees).  So I was able to get up and have a quiet Saturday morning with my coffee and computer before the kiddos got up. I worked on Operation Organize the House and cleaned out my bedroom drawers and bathroom cabinets, stuffing a huge bag full of clothes to give away and another with expired stuff to throw out.  The rest of the day was spent doing exactly what I hoped...relaxing.  I took a nap (a rarity for me anymore), scrapped a bit and planned my shopping list for the Studio Calico reveal tomorrow.

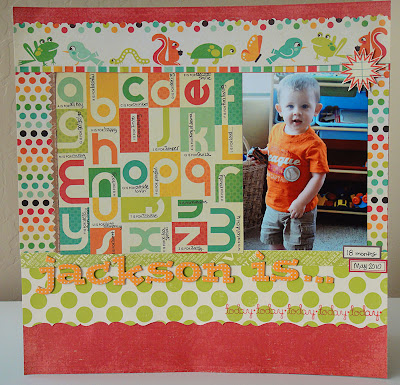
I did this layout using the Studio Calico Partly Sunny June kit/add-on's plus an additional coordinating We R Memory Keepers paper.  I had done a similar page about Nicholas a little while ago so I wanted to do an "alphabet journaling" page for Jackson, too. It worked great to do an 18 month page for him.  I found this 6x6 alphabet section on the backside of the polka-dot WRMK paper and the page was born.  And I love, love, love the stamps from this SC kit too.

Jackson is...

Salmon Pizza is baking in the oven and the boys are eating bagel cheese pizzas (because no matter what time we plan dinner they want to eat earlier.)  Looking forward to some more scrapping tonight after the kiddos are in bed.

Can't wait for the weekend....and weekend plans

DSC04692.jpg

After being gone last weekend, I can't wait to be home this weekend and get some relaxation and scrap time.  This morning I had to whip up a birthday card for a friend, the leftover scraps from the May Mosh-Posh kit were perfect:

This weekend I'm looking forward to:
Starting Camp Scrap at Big Picture Scrapbooking and digging into that this weekend.
Ordering my Studio Calico July kit add-on's (OMG the add on's this month are unbelievable)
Dinner to celebrate the Arizona dad's on Sunday night.
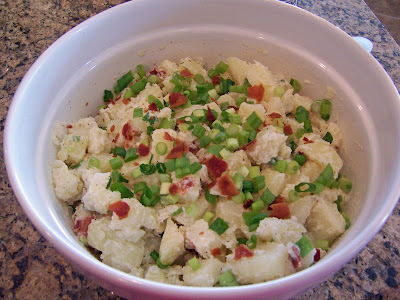
My light potato salad for said dinner.
A quiet Saturday morning before the kiddos wake up drinking coffee from the new Kreuig coffee maker
Hoping the Kindle I ordered today (at the new lower price) gets here this weekend so I can get it set up for some books I want to read.

Working on my 1st challenge for ScrapTiffany that will debut the first week of July.
Happy Friday!

The good old days....

1980s-44.jpg

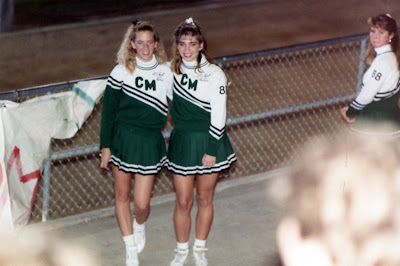
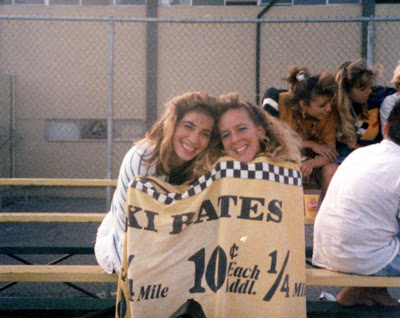
I love Facebook. I had been looking at old pictures from high school this past weekend and I came across pictures of me with one of my best high school friends that I have lost touch with.  We were pretty inseparable during the last couple of years of high school.

She moved away to live with her mom before we finished high school  We saw each other when we could for a while, but back in those days we didn't have e-mail, internet or free long distance on cell phones (we didn't have cell phones!) so it was good old fashioned letters that we had to write to keep in touch.  We did that for a while, but I am sure life got us busy and we lost touch.

Every time I came across these pictures over the years I wondered where she was and what happened to her.  And along comes Facebook and there she is.  The thing I love about Facebook is we are all busy in our everyday lives but it only takes a little bit of time throughout the week to keep in touch.

Some random Friday night during football season....1987

Probably during a water polo game.  Our high school team was great and the cheerleaders didn't miss a match.
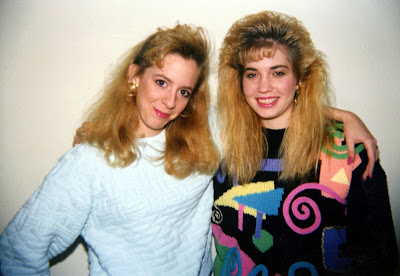
And I have to love the 80's hair here (especially mine, what was UP with that?)  I think this was after high school when I went down to visit Holly at her mom's house and we went out dancing at a club.

Nice to reconnect with old friends.

Father's Day Weekend, Old Family Photos & Cards

DSC01115.jpg

We spent the weekend in California at my Dad and Evelyn's house for Father's Day.  It was a fun filled weekend, my brother and sister were able to be around a lot, which was great since we haven't seen them much in the past couple of years. Friday started off early so we could hit the road, but it was derailed a bit by this munchkin' who ended up in our bed at about 2 a.m. and was up for about an hour.  Nicholas never does this, so it was perfect timing since we planned to get up at 4 and be on the road by 6. :)

He does look cute in that big old bed. The drives both way were pretty uneventful. It was best when they looked like this....

Saturday we met Mike's brother Scott and his family for lunch between our nieces softball tournament games.  Then we headed back to my Dad's house for swimming and celebrating birthdays for my 2 nephews, Christian and Andrew.

Sunday Dad made brunch and we hung out all day.  We took some updated family photos...

Mike got spoiled for Father's Day....

My sister and I spent time with our Dad, looking at old family pictures and finding out who the people we didn't recognize were.

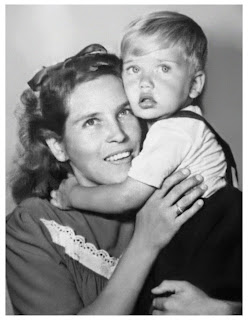
We found great ones like this favorite of both my sister and I of our grandma and dad when he was probably about 2.  She was so pretty and young and he was adorable.  We think every one of my brother's and my boy's have looked like our Dad in this picture at some point.

My Dad and his brothers...(or a picture from The Outsiders.)

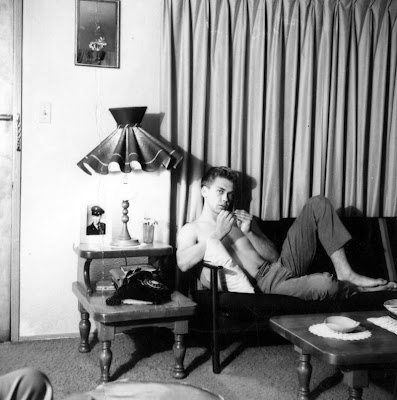
Our Dad sometime in the later 60's, we think.

My sister found this great one of our Grandma, it looks like someone is not behaving and getting that look....

Dad racing his cars that our Grandpa used to build. We know there has to be more of these pictures.

Earl, a great uncle, he was lost at sea in a submarine while in the Navy.  This was one of the last pictures of him.

Our great great grandparents (I think it was on my Grandfather's side)

A slice of Americana...my Uncle Jim and Aunt Noreen.

And a little scrappy stuff...I used Girls Paperie to make Father's Day cards for the Dad's in our life.

Have a great week!