Scrapbooking

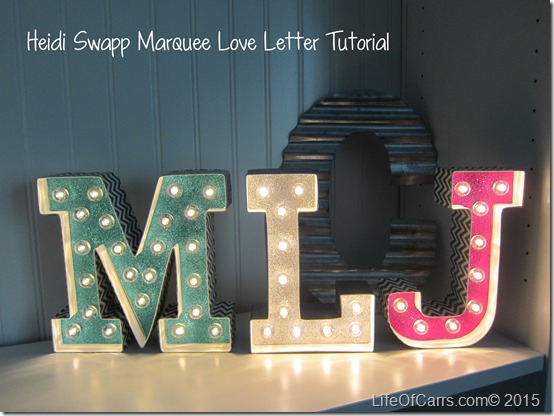
Heidi Swapp Marquee Love Letter Tutorial - Teacher or Mother’s Day Gift Idea

I picked up the Heidi Swapp Marquee Letter’s at Michael’s thinking they could be cute teacher gifts. They turned out to be even easier than I anticipated. I did the first one in less than an hour with about a million kid interruptions. It was also the M which was the hardest of the 3 letters I made. The next two letters were finished in less than 30 minutes each. The J was easier than the L, I’ll explain why below.

Lifeofcarrs_Marquee04262015- (1)

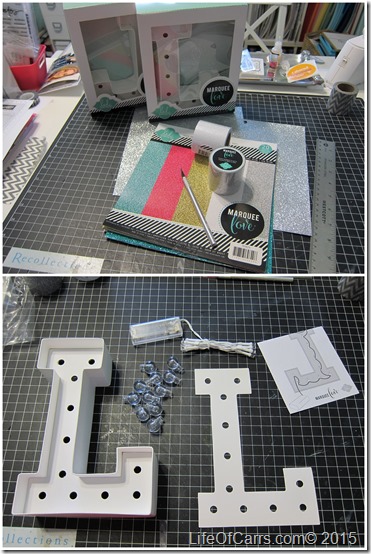
Supplies and tools needed:

  • Heidi Swapp Marquee Love Letters, (they can be found at Michaels, at scrapbook.com and amazon.com.  If you live in the east valley Phoenix area, you can pick up your order and save on shipping and the letters and other supplies are currently on sale.
  • Scrapbook paper - I used the Heidi Swapp Marquee Love Glitter Paper. Anyone that knows me well, would know I didn’t really need to buy the paper but I bought it anyway so I didn’t have to go through my stash and find the perfect paper.
  • 2” washi tape or glitter tape – I  used a chevron washi tape I already had (probably from Studio Calico) and Heidi Swapp Marquee Love Glitter Tape
  • pencil
  • adhesive
  • ruler
  • removable tape (or washi) to hold the letter in place for cutting

Lifeofcarrs_Marquee04262015- (2)

The letter kit comes with the letter, letter template, light bulbs and an LED light strand. They sell extra lights in other colors and light strands, you don’t need them unless you want to change the light color. The light bulbs are plastic so you probably won’t break them.

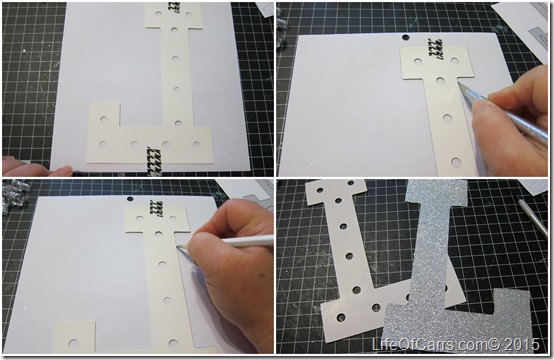
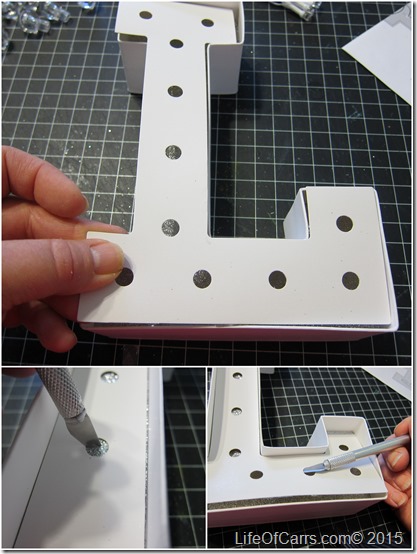
Tape your letter to the backside of the paper. Make sure the letter template is flipped the opposite way, so the letter is cut the right way on the side of the paper you are using. If you are using a patterned paper you will want to make sure that your letter is lined up properly (or you can cut it on the front side - glitter paper can cut weird or tear due to the texture so I wanted to cut from the back where it was smooth.

I traced the letter first with a pencil, in case I missed a spot when I cut or if the letter moved I could realign it easily. Trace around the letter with the craft knife and remove the excess paper.

Lifeofcarrs_Marquee04262015- (3)

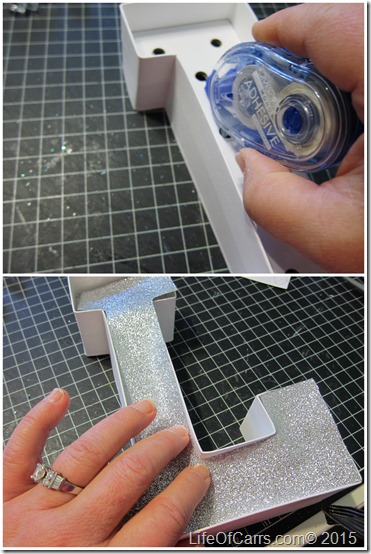
Dry fit the cut letter into the marquee letter before you apply the adhesive.  It will give you an idea how the letter should be laid so that you can lay it down smoothly. Remove the letter and then apply the adhesive. I would recommend using an adhesive that gives you a few minutes to move the paper if needed.  My glue gun is permanent immediately, so I knew I did not want to use that since the paper was a lighter weight.  I used Tombow Adhesive, it is permanent adhesive, but it gives you a little time before it becomes permanent.  Lightly press the paper letter into the cardboard letter smoothing out any bubbles.

Lifeofcarrs_Marquee04262015- (4)

Lay the letter template on top of the cardboard letter (on top of the paper). Use your craft knife to poke holes where the light bulbs will be inserted later.  I did 2 cuts in each hole, in an X shape. Use the craft knife to lift the letter template out of the letter.

Lifeofcarrs_Marquee04262015- (5)

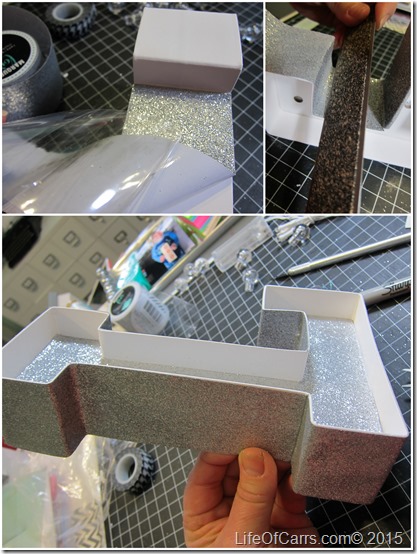
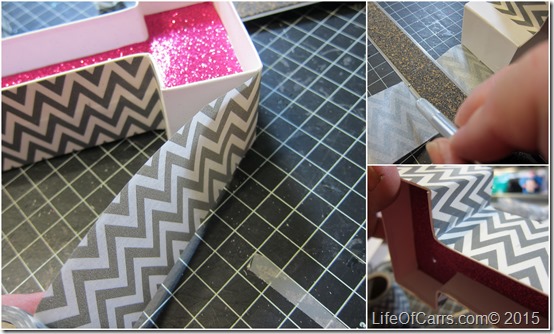
Next use your washi or tape and line it up in an underside area or corner and both edges and SLOWLY adhere the tape.  This is where I tell you I prefered to use the washi tape because it is easier to work with as you are able to lift it up and re-align as you move around the letter. The glitter tape is not moveable once you press it down. I needed to cut it at a few of the inside corners because the marquee letter material is not perfect (and I am not either). I recommend using a ruler along the letter to smooth it out as you go and in the inside corners of the letters to crease the tape in the corner for good adherence.

Lifeofcarrs_Marquee04262015- (6)

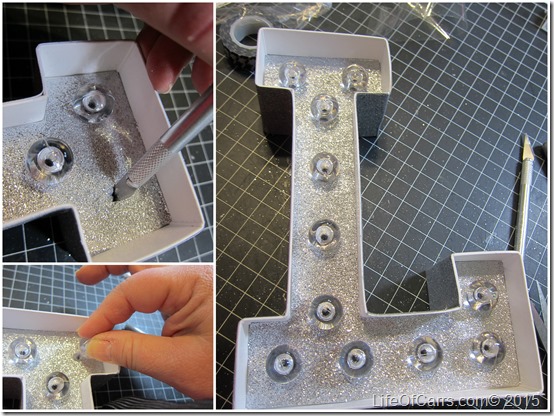
Now you are ready for adding your bulbs. Find the holes that you previously cut and insert the light bulbs into the holes. They fit snuggly, not difficult at all to place, and it looks to me like they should stay in well over time.

Lifeofcarrs_Marquee04262015- (7)

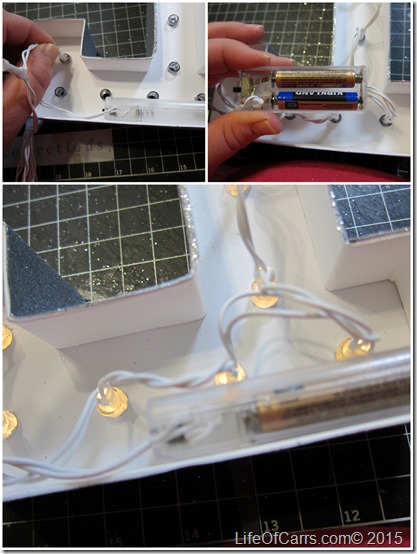
Flip your letter over and figure out where you want the battery box to sit at the bottom of the letter.  Insert your batteries (2 AAA batteries) and place your box inside the letter where you can reach the on/off button. String the lights keeping the cords inside the back of the letter.

Lifeofcarrs_Marquee04262015- (8)

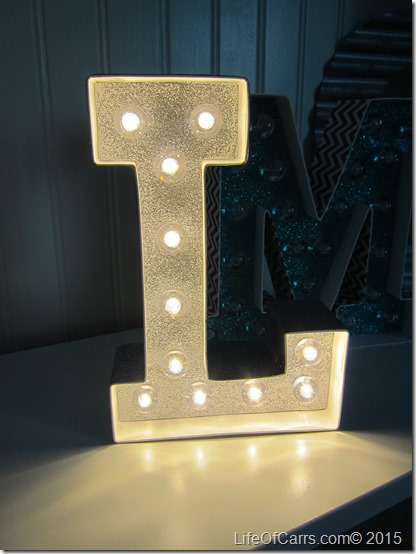
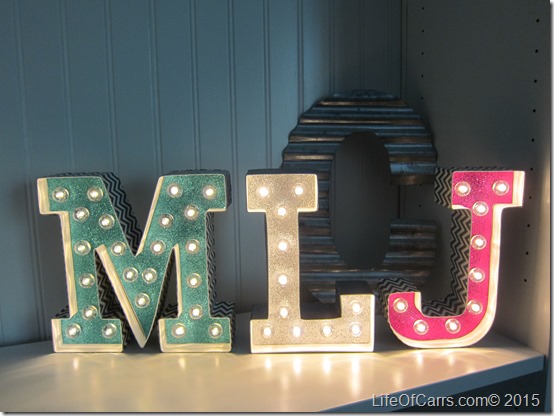
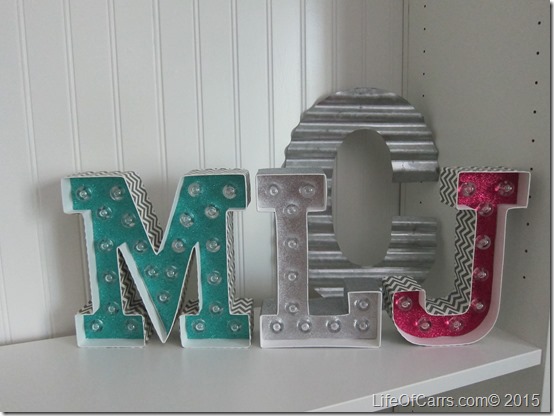
Here is another letter I did using washi tape.  It took about 10 minutes to do the glitter tape on the “L” letter and less than 5 to use washi tape on the “J” letter.  I also used the washi tape on the “M” letter, that one took a little longer being my first attempt and also the inside of the letter was harder to get lined up. When finishing up the tape, it is best to be on the bottom or on the underside of part of the letter. I measured out what I needed on the last section and did a straight cut on the tape and then had a small overlap that isn’t noticeable on the underside of the J.

Lifeofcarrs_Marquee04262015- (9)

Easy peasy! And so fun!

Lifeofcarrs_Marquee04262015- (10)

It’s a coincidence that the L & J for the teachers also happen to be my initials with my maiden name. Now I may go back and get more letters to make another L and J for me.

Lifeofcarrs_Marquee04262015- (11)

It was a fun easy project. Perfect for teacher gifts and mother’s day. And the just make me happy!  You can also paint these (although I would wonder how it would hold up without warping since it is just made out of cardboard). You could use glitter or any other type of medium you could imagine.

Lifeofcarrs_Marquee04262015- (12)

Now if I could just find more of that washi tape.

Catching Up on Project Life

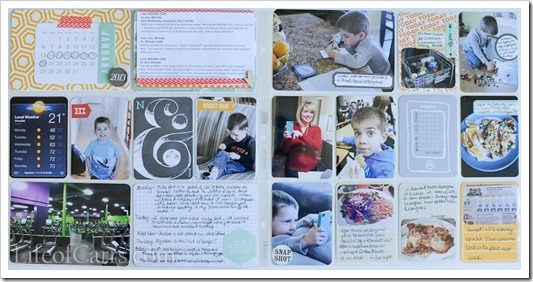
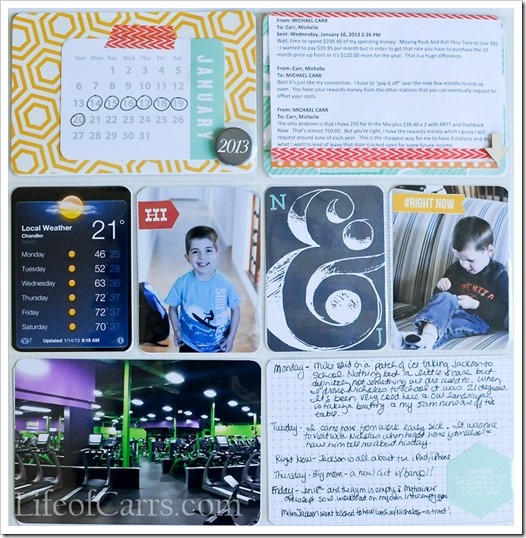
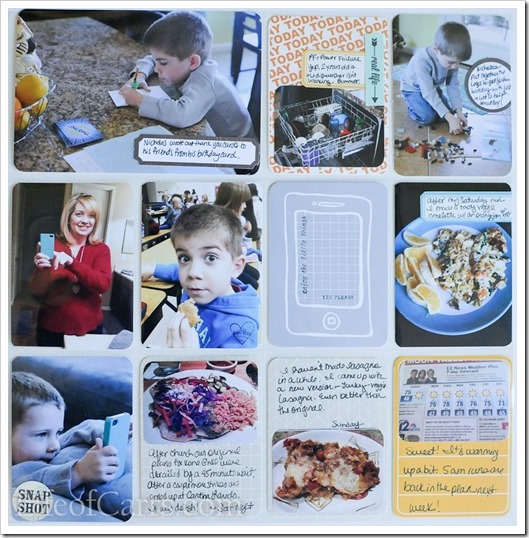
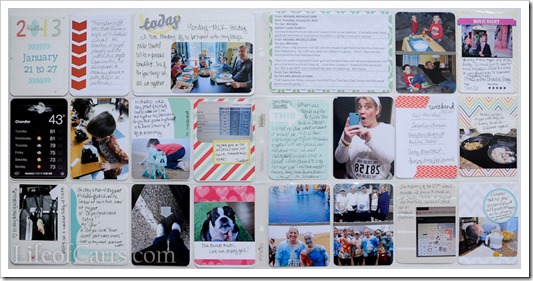
I am actually doing pretty well on staying caught up on my Project Life album this year.  I am more appropriately behind in sharing any pages.  Today I thought I would finish off sharing January 2013 with a look back at 2012.  January’s are pretty busy for us normally with getting back into the swing of real life and celebrating Nicholas’s birthday. Because of the holidays, we seem to scramble to get ready for his party every year. 2013 Week 3

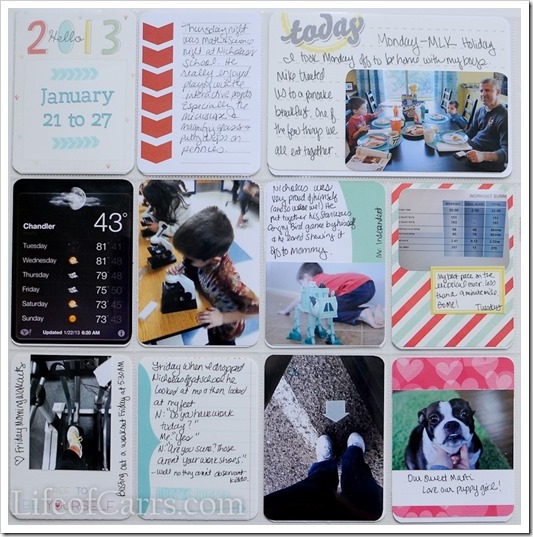
Nicholas started getting interested in Lego’s after receiving some for his birthday. I had my hair cut with bangs, the first big change in a while. I was shocked how dead the gym was for January. Mike made some changes to his radio station hosting.

20130127-_DSC9911

20130127-_DSC991420130127-_DSC9917

20130127-_DSC9920

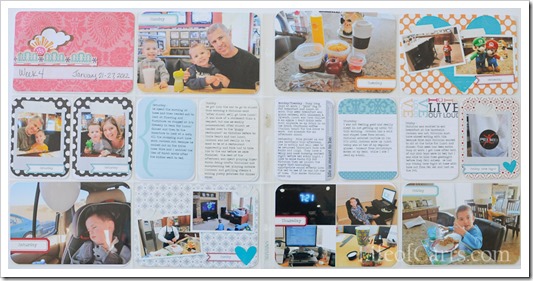
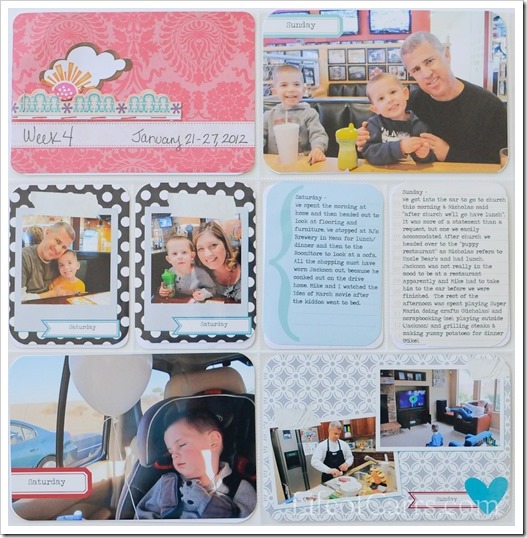
2013 Week 4

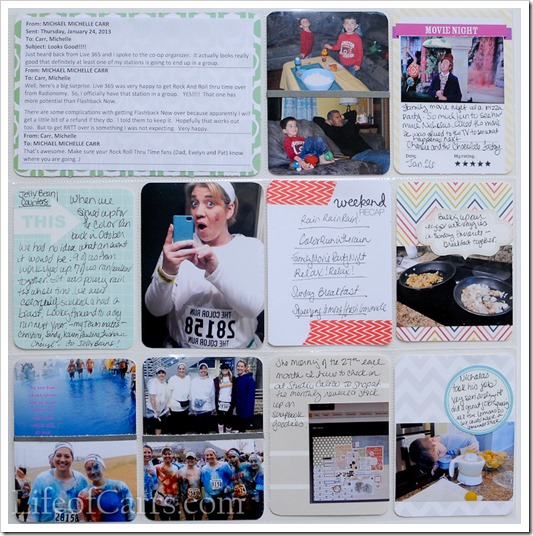
We had math and science night at Nicholas’s school this week. I did my first Color Run in the pouring rain. We had a great time, but we were soaked to the core. We had a family movie night watching Charlie and the Chocolate Factory (first time for the kiddos). Nicholas loved the movie, except he did not like the part where Charlie and his grandpa are in danger until they figure out burping will save them. We almost had to stop the movie at that point until he was sure they were going to be okay.

MCarr_Feb2013-2_PLWk4

MCarr_Feb2013-3_PLWk4

MCarr_Feb2013-4_PLWk4

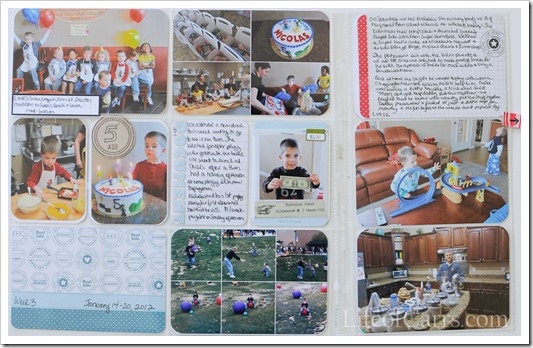
2012 Week 3

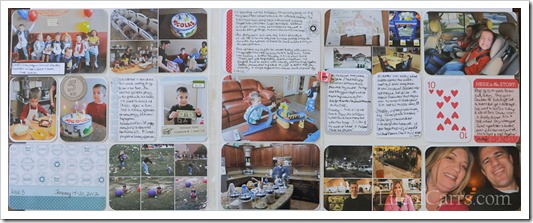
Last year week 3 included Nicholas’s birthday party, a rare date night for Mike and me and us trying a new church. Jackson was star of the week at school and Nicholas helped us make his poster.

2012PL-8

2012PL-9

2012PL-10

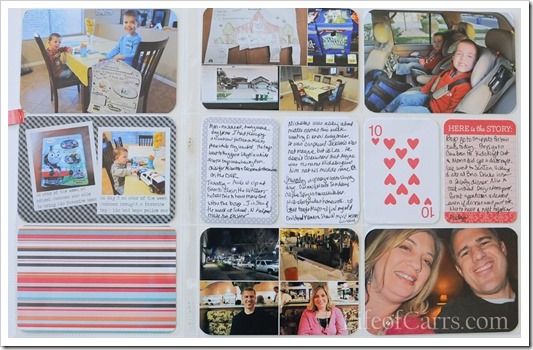
2012 Week 4

By the end of January we were getting ready to start on some home improvement projects and started by shopping for a new couch. We had Friday date night with take out at home.

2012PL-11

2012PL-12

2012PL-13

Hoping to catch up with more weeks and share some layouts over the next couple of weeks. I also have a major change to share in my scrap room. I have been busy this year, so I guess that explains my continued lack of blogging.

Have a great Wednesday!

Project Life 2013…oh, and Hello again!

20130113-_DSC93411.jpg

It’s been awhile, I know. Somehow the good intentions to blog just seem to be swept aside by life. One of my goals for this year was to blog here and over at Getting Healthy at least once a week in 2013.  I guess I am a bit late to the party, but that’s life. In 2012 I finished my first full year of doing a Project Life album. I will admit that the last several months were finally documented mostly in December. But it was an accomplishment nonetheless. It made me excited to tackle 2013 a little more timely. I helped that desire along by subscribing to Studio Calico’s Project Life monthly kit.

My week’s for the 2013 album will go Monday to Saturday with the plan to document the previous week the following weekend. I don’t worry about having a picture a day, I am trying to capture our week.  I may skip weeks or combine them, whatever works. This is not a high maintenance project for me.  So far, I am still on track.  I am planning to keep it simple by using only the supplies I throw in my Project Life basket throughout the month and the Studio Calico kits.

This album is totally worth doing. Yesterday it was awesome when I was working on the week 2 pages and Nicholas and Jackson came over and sat with me to look at the pictures and talk about the week.

That is what is really about…documenting our everyday life.

This year I thought it would be fun to share the Project Life pages I do each week or two and also show the pages for the same period in 2012. (Whether or not it is fun for you, I know it will be for me. Winking smile)

2013 Project Life

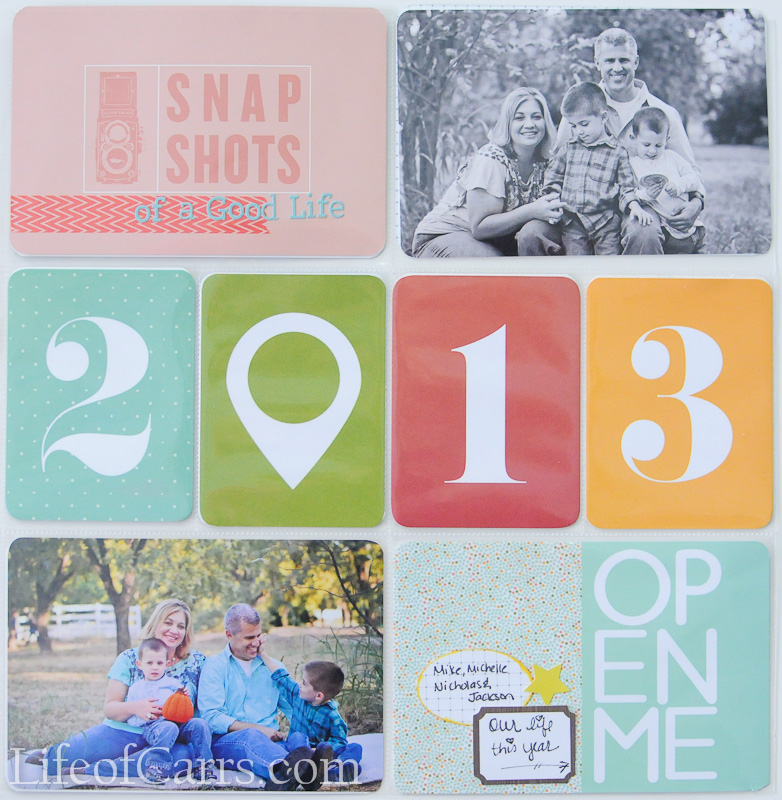
Here is my 2013 opening page…I thought of a 1000 ways to improve it after I finished, but then I called it good and scrapped a layout instead.  (The photos were taken by the sweet and talented Becca Pikula)

20130113-_DSC9341

I loved the cards that were included in the Studio Calico kit, it made the cover page come together really fast and focus on the family photos.

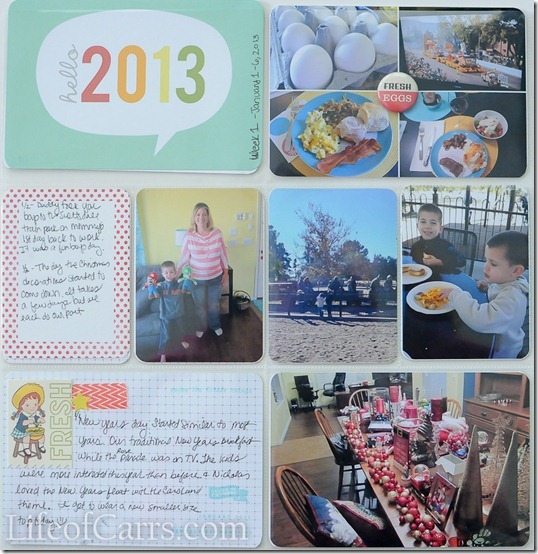
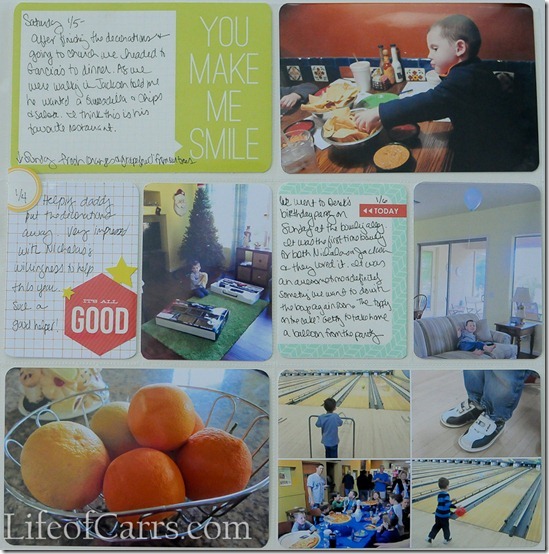
Week 1 -  I used a combination of the Studio Calico Project Life and regular kits and some various printables I already had. I prefer to use the Design A page protectors, but hope to mix it up this year somewhat – I have all the other sizes, so I just need to think about it when I select and print my pictures for the week.

Week 1

20130113-_DSC9346s

After I select and edit my pictures in Lightroom, I use Picasa to do quick collages. I don’t even bother with Lightroom or Photoshop for the collages. For me, it is a lot faster in Picasa.  I use this especially for the 3x4 pictures I pick 2 vertical photos and pull them into a 4x6 grid collage; save and ready to upload for printing.

Week 1 (Left)

20130113-_DSC9348

I like to include a lot of pictures from the week and collages allow me to do it.  I don’t need one photo and one journaling card a day.  I combine jpurnaling for a couple of days on a 4x6 sometimes. It’s all good.

Week 1 (Right)

20130113-_DSC9351

Week 2

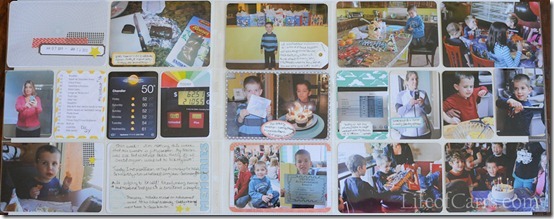
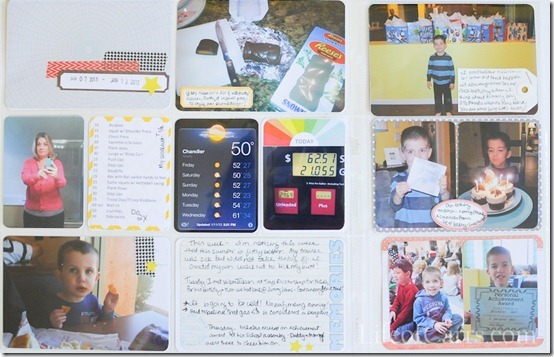
It was Nicholas’s birthday this week and we had extra pictures so I added an American Crafts 6x12 3-up page in between the normal Design A pages. I love the 6x12 for squeezing in a few extra pictures in a week. I really only want one album for the year so this helps me accomplish that.

20130120-_DSC9479

Week 2 (Left)

20130120-_DSC9482

Week 2 (Right)

20130120-_DSC9485

and here is what we were doing last year at the same time…

2012 Project Life

2012 Cover

Last year’s opening page included pictures from our photo shoot with Sarah Heinle who did a fabulous job with the kiddos even with an incredibly uncooperative little Jackson.

2012PL-1

Week 1

Last year I used the Clementine core kit by Becky Higgins with a little supplementing from my stash.  I had also picked up the coordinating digital life kit from Jessica Sprague which is now available at AC Digitals. Early in 2012 I did a lot more hybrid cards and photos with Project Life. But as time got away from me I did less of it.

2012PL-2

Week 1 (Left)

The polaroid and white bordered frame collages were done in Picasa. I did pull it into Photoshop Elements to add the digital paper background, but you could cut the photos out and adhere them to normal paper too.

2012PL-3

Week 1 (Right)

2012PL-4

Week 2

Another time I used the American Crafts 6x12 page protector. We had Grandma and Grandpa visiting that weekend and Nicholas’s birthday so we had extra pictures I wanted to include.

2012PL-5

Week 2 (Left)

Another thing I noticed I did more early in 2012 was include more of the day stickers for each photo. That ended too when I had enough to worry about just getting the weeks together, let alone trying to remember which day was which.  Again – following the KISS method  (keep it simple silly) Smile.

2012PL-6

Week 2 (Right)

I liked using the digital cards to type my journaling on using a typewrite font, maybe if I keep up more this year that will work out, and then again maybe it won’t. Who knows? We’ll just have to wait and see. Smile

2012PL-7

Thanks for stopping by.

12 on 12 in January

Life-of-Carrs.com-12-on-12-January-2012.jpg

I had been considering documenting a day each month in 2012 in pictures. I was going to do 3 on 3, but kept coming back to 12 on 12.  I guess a lot of others in the scrap and photo world have the same idea because I am seeing it pop up everywhere today. Here are the snippets of my day, my 12 on 12 for January

(1) Pancakes for breakfast before school. (2) Me and the new camera, thanks to the parents ;) - I need a haircut. (3) taking a much needed quick break this afternoon after non-stop meetings and demands from when I walked in until late this afternoon. (4) Lot's to do according to my planner. (5) What's on my podcast list this week (6) New Powerball ticket, the one I turned in was a loser. (7) Ouch, what it costs to fill up the Tahoe at $3.29/gallon (8) That's my boy, one shoe on one shoe off, let's go outside! (9) Mario is getting ready for an overnight trip to the bakery, where he will be the star of Nicholas's birthday cake on Saturday. (10) Looks like the first week back after winter break was a bit tough on Jackson (11) Pinterest - the ultimate time suck (12) Kiddos asleep, now it's play time for the grown ups

Week in the Life - Sunday

LifeofCarrs.com - Week In The Life 2011-6Sunday, July 31 In Photos:

In Words:

Day:  Sunday, July 31, 2011

Wake:  6:20 a.m.
Sleep:  10:50 p.m.
Weather:  108 degrees
Work:  No thanks, hanging out today
Plan:  Dinner at Garcia’s with the Carr grandparents
Eating:  Pancakes & bacon for breakfast
Drinking:  Lots of water
Exercising:  Oops,I forgot
Listening:  Silence, 4 kids in the house are now asleep
Watching:  I wasn’t watching, but there was baseball
Feeling:  Refreshed after a good night’s sleep
Thinking:  About interior design
Doing:  Measuring rooms; and, swimming before the storm
Wanting:  To redecorate most of my house
Needing:  Money to actually do it, ha!
Loving:  Watching the Carr cousins bond

Week in the Life - Saturday

LifeofCarrs.com-Week-In-The-Life-2011-5.jpg

Saturday, July 30 In Photos:

In Words:

Day:  Saturday, July 30, 2011
Wake:  5:21 a.m. (thanks Marti)
Sleep:  10:35 p.m.
Weather:  106 degrees with a mid-day storm
Work:  House chores most of the day until 3:00 p.m.
Plan:  Jon & girls coming for the week
Eating:  Subway subs for lunch          
Drinking:  Pomegranate lemonade
Exercising:  Day off
Listening:  Mario Kart on the Wii in the background
Watching:  Tori & Dean on the DVR while scrapping
Feeling:  So hot today and sticky today
Thinking:  Nichols is obsessed with the Wii
Doing:  Organizing my scrap room & the coupon binder; hanging a shelf in the laundry room & new posters in the boys room
Wanting:  To create a “Cool in the Pool” mini album
Needing:  A shower every time I come back inside from the heat
Loving:  Nicholas so excited for his cousins to get here

Week in the Life - Friday

LifeofCarrs.com-Week-In-The-Life-2011-4.jpg

Friday, July 29 In Photos:

In Words:
Day:  Friday, July 29, 2011
Wake:  5:28 a.m.
Sleep:  1:05 a.m.
Weather:  108 degrees (or 103, but it is hot!)
Work:  Arrive – 9:05 a.m. Depart 6:05 p.m.
Plan:  To not work late tonight
Eating:  Oregano’s Grandma G’s Rosemary Chicken Potato Pizza– yum!
Drinking:  Ice Sparkling Water
Exercising:  Yoga & Stretching
Listening:  LOAD & Paperclipping Podcasts
Watching:  Did you Hear About the Morgans?; Hawaii 5-0 & Tori & Dean on the DVR
Feeling:  Free from some clutter
Thinking:  About new work assignment – a fun challenge
Doing:  Cleaning & organizing my scrap room
Wanting:  To re-decorate the guest bathroom
Needing:  A good night’s sleep
Loving:  Extra time spent with Nicholas & Jackson this morning

Week in the Life - Thursday

LifeofCarrs.com-Week-In-The-Life-2011-3.jpg

Thursday, July 28 In Photos:

In Words:

Day:  Thursday, July 28, 2011
Wake:  5:35 a.m.
Sleep:  11:25 p.m.
Weather:  108 degrees
Work:  Arrive – 8:53 Depart – 7:08
Plan:   Run errand at lunch
Eating:  In N Out Burger for lunch
Drinking:  Starbucks Italian Roast Coffee
Exercising:  Yoga & Stretching
Listening:  Layout a Day & Motherload Podcasts
Watching:  More Hawaii 5-0 & Tori & Dean on the DVR
Feeling:  Exhausted but happy
Thinking:  That work will never slow down to a livable pace…I guess that’s good
Doing:  Organizing and purging photos
Wanting:  A few more hours each day
Needing:  To clean out the coupon binder
Loving:  Nicholas’s excitement at learning how to play the Wii

Week in the Life - Wednesday

LifeofCarrs.com-Week-In-The-Life-2011-2.jpg
Wednesday, July 27
In Photos:
In Words:
Day:  Wednesday, July 27, 2011
Wake:  5:10 a.m.
Sleep:  10:40 p.m.
Weather:   104 degrees         
Work:  Arrive – 7:47 a.m. – Depart – 4:35 p.m.
Plan:  Physical therapy – trying to heel my foot
Eating:  Spaghetti       
Drinking:   Blackstone Merlot
Exercising:   Yoga & stretching
Listening:  Digi Show Podcast & weekend church service
Watching:  More Hawaii 5-0 on the DVR
Feeling:  Frustrated
Thinking:  That I need to clear my head
Doing:  Physical therapy to heal my foot and ankle
Wanting:  Wood flooring in the family room
Needing:   A more peaceful day tomorrow
Loving:  Catching up on classes at Big Picture

Week in the Life - Monday & Tuesday

LifeofCarrs.com-Week-In-The-Life-2011-1.jpg

I wasn't going to join the Week in the Life project this week. I decided Monday morning to go for it and just approach it differently than last year. It ends up being the same week I documented last year when I took tons of pictures every day and wrote tons of details. This year, I am taking a cue from Kelly Purkey's class at Big Picture Classes and doing a quick summary of my day, mostly from my perspective with just a few photos.

Monday July 25
Day: Monday, July 25, 2011
Wake: 5:35 a.m.
Sleep: 10:50 p.m.
Weather: 101 degrees
Work: home sick today
Plan: first day of pre-k for Nicholas
Eating: tilapia tacos
Drinking: Landshark beer
Exercising: yoga & stretching – calves very sore
Listening:  quiet house after boys are asleep
Watching:  Tori & Dean re-runs on Oxygen
Feeling:  achy, hot and tired today
Thinking: about losing weight
Doing: setting up school archive boxes from pre-school to 12th grade for both boys
Wanting:  to purge the excess in the house
Needing:  to get some extra sleep
Loving: the box of memories Dion brought this weekend
Tuesday July 26
Day: Tuesday, July 26, 2011
Wake: 5:35 a.m. - after being licked by Marti
Sleep: 10:30 p.m. - in the family room chair
Weather: 106 degrees
Work: arrived - 9:45 departed – 7:15 home – 7:45
Plan: first day at new preschool for Jackson
Eating: awful Healthy Choice frozen meal for lunch
Drinking: iced tea
Exercising: yoga and stretching
Listening: Mike’s radio station when going to sleep
Watching: Hawaii 5-0 on the dvr
Feeling: so much better than yesterday – back to normal
Thinking: behind. I am too busy at work right today – too many meetings not enough work time.
Doing: volunteer training at Nicholas’s school
Wanting: to get home earlier at night
Needing: preservation spray from Michael’s
Loving: how excited Jackson was after getting his new outfit on for school & taking his 1st day photo shoot