DIY

Heidi Swapp Marquee Love Letter Tutorial - Teacher or Mother’s Day Gift Idea

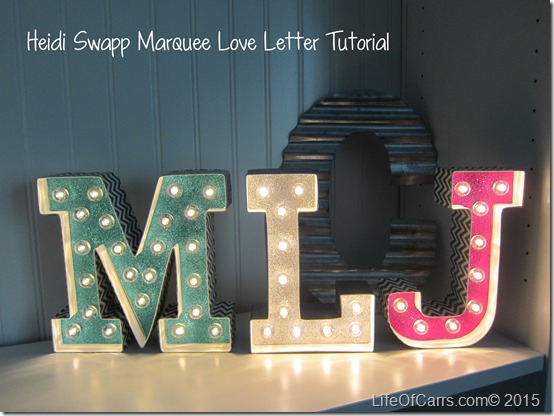
I picked up the Heidi Swapp Marquee Letter’s at Michael’s thinking they could be cute teacher gifts. They turned out to be even easier than I anticipated. I did the first one in less than an hour with about a million kid interruptions. It was also the M which was the hardest of the 3 letters I made. The next two letters were finished in less than 30 minutes each. The J was easier than the L, I’ll explain why below.

Lifeofcarrs_Marquee04262015- (1)

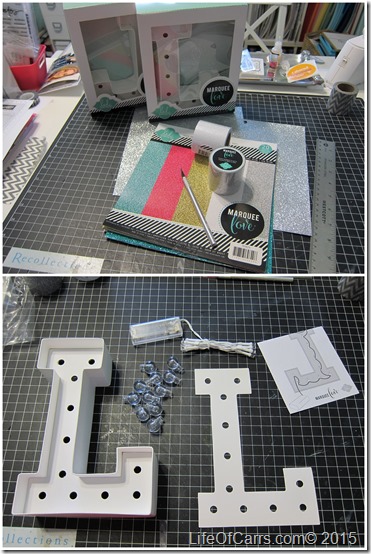
Supplies and tools needed:

  • Heidi Swapp Marquee Love Letters, (they can be found at Michaels, at scrapbook.com and amazon.com.  If you live in the east valley Phoenix area, you can pick up your order and save on shipping and the letters and other supplies are currently on sale.
  • Scrapbook paper - I used the Heidi Swapp Marquee Love Glitter Paper. Anyone that knows me well, would know I didn’t really need to buy the paper but I bought it anyway so I didn’t have to go through my stash and find the perfect paper.
  • 2” washi tape or glitter tape – I  used a chevron washi tape I already had (probably from Studio Calico) and Heidi Swapp Marquee Love Glitter Tape
  • pencil
  • adhesive
  • ruler
  • removable tape (or washi) to hold the letter in place for cutting

Lifeofcarrs_Marquee04262015- (2)

The letter kit comes with the letter, letter template, light bulbs and an LED light strand. They sell extra lights in other colors and light strands, you don’t need them unless you want to change the light color. The light bulbs are plastic so you probably won’t break them.

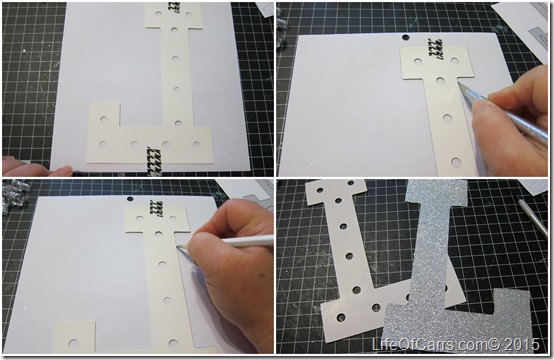
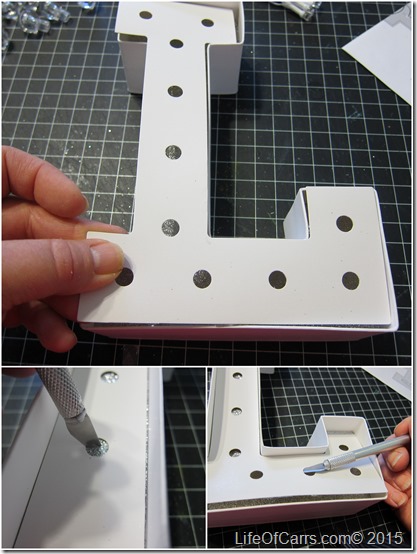
Tape your letter to the backside of the paper. Make sure the letter template is flipped the opposite way, so the letter is cut the right way on the side of the paper you are using. If you are using a patterned paper you will want to make sure that your letter is lined up properly (or you can cut it on the front side - glitter paper can cut weird or tear due to the texture so I wanted to cut from the back where it was smooth.

I traced the letter first with a pencil, in case I missed a spot when I cut or if the letter moved I could realign it easily. Trace around the letter with the craft knife and remove the excess paper.

Lifeofcarrs_Marquee04262015- (3)

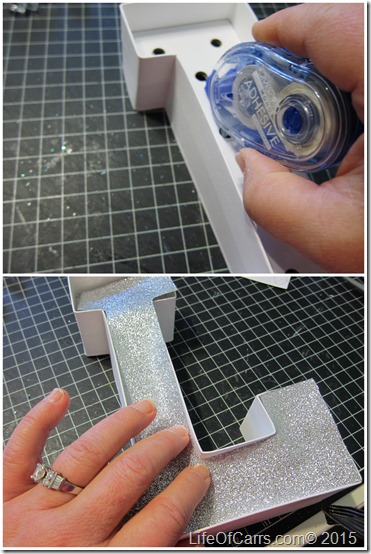
Dry fit the cut letter into the marquee letter before you apply the adhesive.  It will give you an idea how the letter should be laid so that you can lay it down smoothly. Remove the letter and then apply the adhesive. I would recommend using an adhesive that gives you a few minutes to move the paper if needed.  My glue gun is permanent immediately, so I knew I did not want to use that since the paper was a lighter weight.  I used Tombow Adhesive, it is permanent adhesive, but it gives you a little time before it becomes permanent.  Lightly press the paper letter into the cardboard letter smoothing out any bubbles.

Lifeofcarrs_Marquee04262015- (4)

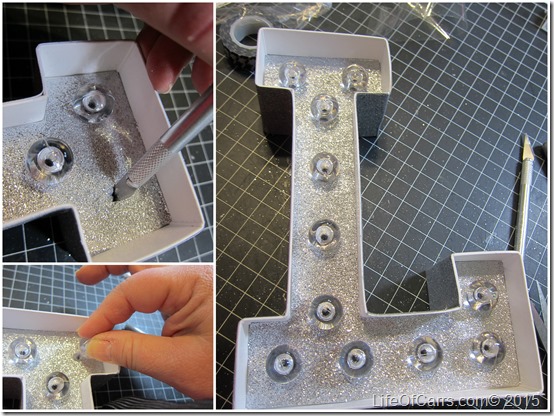
Lay the letter template on top of the cardboard letter (on top of the paper). Use your craft knife to poke holes where the light bulbs will be inserted later.  I did 2 cuts in each hole, in an X shape. Use the craft knife to lift the letter template out of the letter.

Lifeofcarrs_Marquee04262015- (5)

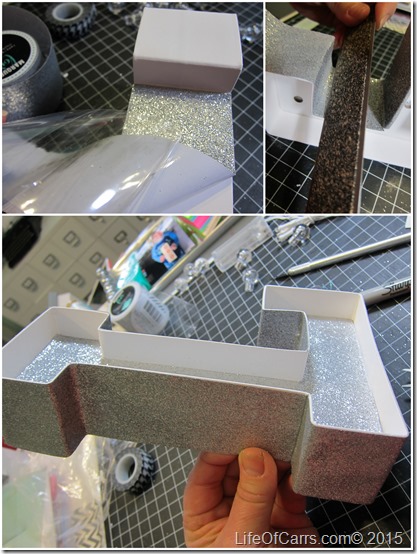
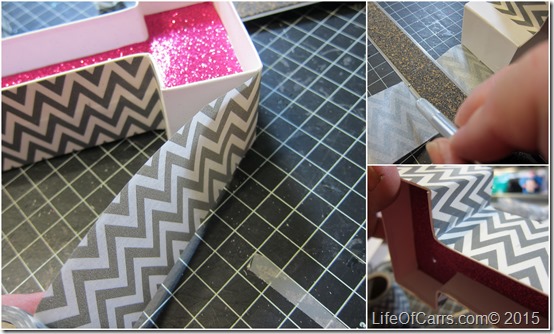
Next use your washi or tape and line it up in an underside area or corner and both edges and SLOWLY adhere the tape.  This is where I tell you I prefered to use the washi tape because it is easier to work with as you are able to lift it up and re-align as you move around the letter. The glitter tape is not moveable once you press it down. I needed to cut it at a few of the inside corners because the marquee letter material is not perfect (and I am not either). I recommend using a ruler along the letter to smooth it out as you go and in the inside corners of the letters to crease the tape in the corner for good adherence.

Lifeofcarrs_Marquee04262015- (6)

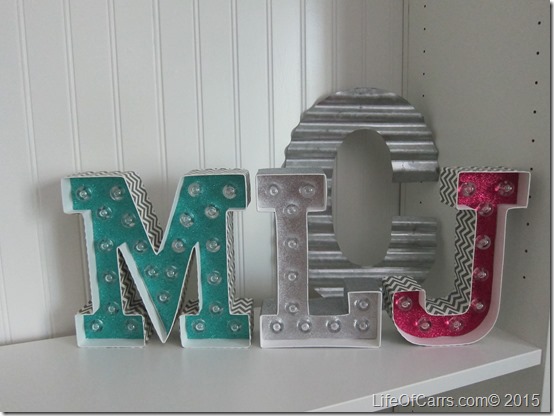
Now you are ready for adding your bulbs. Find the holes that you previously cut and insert the light bulbs into the holes. They fit snuggly, not difficult at all to place, and it looks to me like they should stay in well over time.

Lifeofcarrs_Marquee04262015- (7)

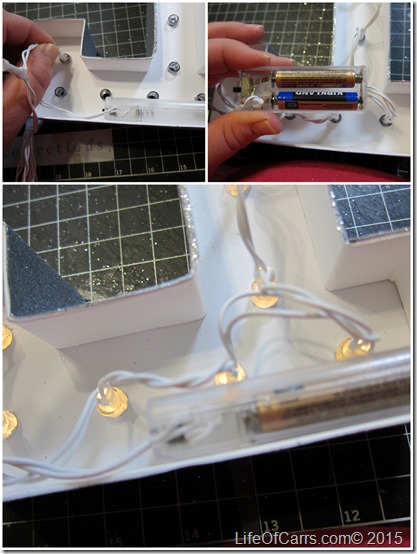
Flip your letter over and figure out where you want the battery box to sit at the bottom of the letter.  Insert your batteries (2 AAA batteries) and place your box inside the letter where you can reach the on/off button. String the lights keeping the cords inside the back of the letter.

Lifeofcarrs_Marquee04262015- (8)

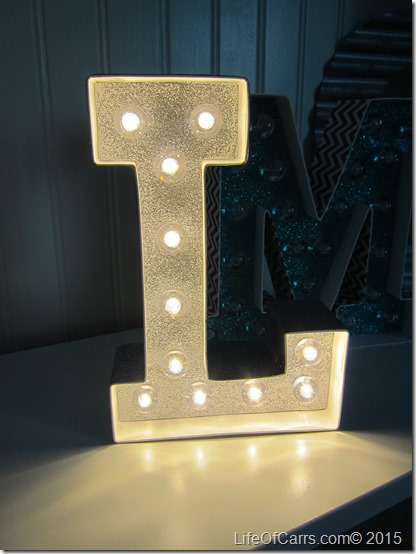
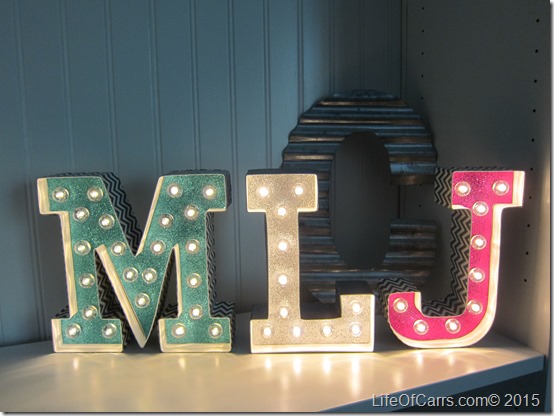
Here is another letter I did using washi tape.  It took about 10 minutes to do the glitter tape on the “L” letter and less than 5 to use washi tape on the “J” letter.  I also used the washi tape on the “M” letter, that one took a little longer being my first attempt and also the inside of the letter was harder to get lined up. When finishing up the tape, it is best to be on the bottom or on the underside of part of the letter. I measured out what I needed on the last section and did a straight cut on the tape and then had a small overlap that isn’t noticeable on the underside of the J.

Lifeofcarrs_Marquee04262015- (9)

Easy peasy! And so fun!

Lifeofcarrs_Marquee04262015- (10)

It’s a coincidence that the L & J for the teachers also happen to be my initials with my maiden name. Now I may go back and get more letters to make another L and J for me.

Lifeofcarrs_Marquee04262015- (11)

It was a fun easy project. Perfect for teacher gifts and mother’s day. And the just make me happy!  You can also paint these (although I would wonder how it would hold up without warping since it is just made out of cardboard). You could use glitter or any other type of medium you could imagine.

Lifeofcarrs_Marquee04262015- (12)

Now if I could just find more of that washi tape.

It Started With This - Our Home Makeover Inspiration

LifeofCarrs.com-House-of-Carrs-Makeover-Inspiration.jpg

It all started with this.... Lemons

I can't believe that it was over 2 years ago when the seed was planted.  After we put the Christmas decorations away I knew I was really tired of our wine country themed kitchen.

Our kitchen before...

Wine Country Kitchen

Instead of putting things back the way they were, I filled a vase with some lemons and an idea began to form. It simmered for quite awhile. What I was thinking was very different than what we were used to.

We had played it safe decorating our first home (Who am I kidding? I didn't really decorate it at all for the first 3 years we lived there).  The walls were plain and white; the tile, white; the carpet,white;..really, it was a lot of white. It was the first place we owned and we could hang stuff on the walls, but we didn't for a long time.  We didn't know what to do with it, so we didn't do much of anything.

Oh, but we did have a huge island with a Corian countertop. It was purple. We selected it when we built the house.  Purple? What were we thinking? Now I am wondering if it was that countertop choice that made me want to move. Did I mention I only dislike one color, only one?  Yep, you guessed it....purple. I don't think I disliked it then. Heck, I also had 2 bathrooms decorated in purple stuff. But today, yeah even my 5 year old knows that I don't like purple.

Here it is in all it's purple and white glory (at least this photo was taken after I wasn't afraid to try a little decorating). I guess a wine country theme worked great with purple.

House_of_Carrs_the_purple_counter

And WOW!! That is a lot of white, and I think the tile had purple tones in it. I think the grout was purple.

What do you know? There are the lemons on the right side of the island. Maybe the seed was planted a long, long time ago. :)

When we built our current home, we opted for whole house "Apache Tan", and other than my craft room and my oldest's room, lived safe with a house full of earth tone decor for almost 7 years.  Brown walls, brown tile, beige carpet, stone, cherry wood, brown leather...BROWN.  Want proof...here is the "before" family room.

HouseofCarrs_Before_Family_Room

A little disclaimer...this is when it was nice and neat...(circa 2005 or 2006) that would be before kids. Apparently, it was also when I didn't know I should turn off the camera flash and use natural light when taking a picture.

(If you thought I was going to show you reality this early in this blog's life, sorry. If you really want to know what real life not picked up looks like...follow the link in my side bar to my personal blog. I am sure there are pictures there that do not show a clean and clutter free home).

That original seed that was planted a couple of years ago began to fully form into a new vision for our home.  A vision now that has taken on a life of it's own. How is that one idea or project leads to another, and another, and a 100 more?

My dilemma...a limited budget (don't most of us face this?). The first 2 jobs were to replace the badly worn carpet in the main rooms and paint. Painters are expensive and I have a long list of needs and wants that gets added to daily. The square footage of the immediate floor replacement was less expensive to hire out.

We opted to have the 800 square feet of new flooring installed for us.  Leaving the painting as our first big DIY project . Phase 1 of "Project Paint" started in February and involves close to 2,500 square feet of our almost 4,000 square foot home.

As of today, we have finished around 2,000 square feet, with 500 to go, plus repainting all the doors and trim. Our flooring has been installed and now it seems we are forever in the middle of a DIY project.

Stay tuned as we share our tales of joy and frustration.  I'll sign off with this sneak of what's to come.

Kitchen_Sneak

Michelle

Wednesday Home Decor Share - Fruit Topiary and 2 new Layouts

A while back Becky Higgins shared on her blog a home decor project for making a fruit topiary.  I am in the process of planning some redecorating in a few rooms to change from browns and oranges to some bright happy colors (yellow, green, blue and white).  So this looked like a good thing to add to my new decor. This past weekend I finished up the first one. I do think I will paint the vase a different shade.  It isn't quite the green I am looking for.
While making this I also had an idea for some fall themed arrangements. I ended up making 3 of them. I will share those soon.

I cannot wait for the long weekend, although Mike informed me that the cooler weather we've had the past few days (closer to 100 degrees than 110) will not be lasting through the weekend. So it could be another weekend stuck inside in the a/c.

This past weekend I was able to scrap quite a bit.  Here are a couple of layouts I did. I didn't love this picture, but since we have so few of the 4 of us together, I hung onto it. I can't wait for it to cool off so we can get back to the zoo this fall.

LifeofCarrs.com_Zoo Layout

LifeofCarrs.com_Zoo CloseUp
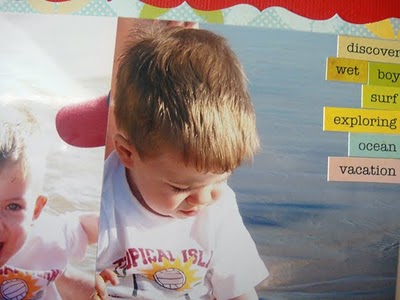
My original plan for the Studio Calico July kit was to work on past vacation pictures. So I finally used it for a layout from our San Diego trip from a couple of years ago.  I did a whole mini with beach pictures that Nicholas looks at all the time. So a one pager with my favorite photos from that afternoon at the beach will be enough for our Places We Go - Far Away album.  And that border below the pictures is one of the new EK Sucess jumbo scallop border punches. Can't wait to use more of them.
LifeofCarrs.com_San Diego 2008 Layout
LifeofCarrs.com_San Diego 2008 Close Up1

LifeofCarrs.com_San Diego 2008 Close Up2

 Have a great Wednesday!