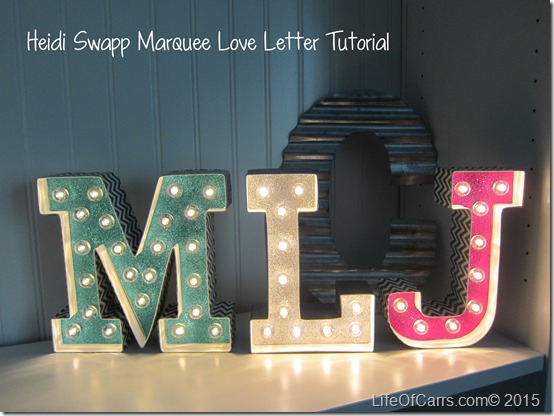
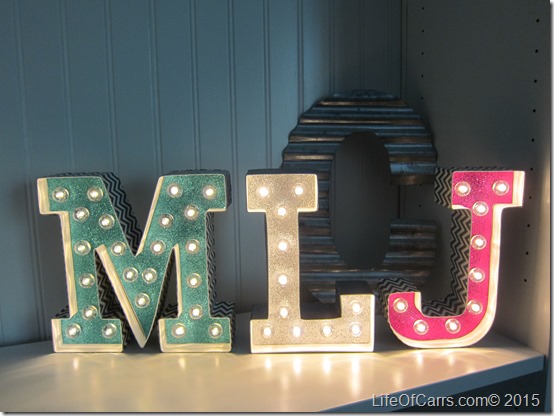
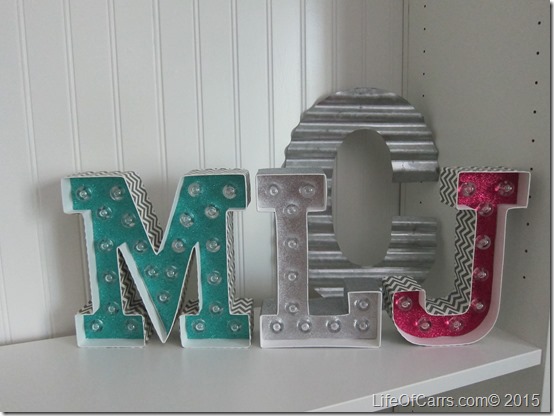
I picked up the Heidi Swapp Marquee Letter’s at Michael’s thinking they could be cute teacher gifts. They turned out to be even easier than I anticipated. I did the first one in less than an hour with about a million kid interruptions. It was also the M which was the hardest of the 3 letters I made. The next two letters were finished in less than 30 minutes each. The J was easier than the L, I’ll explain why below.
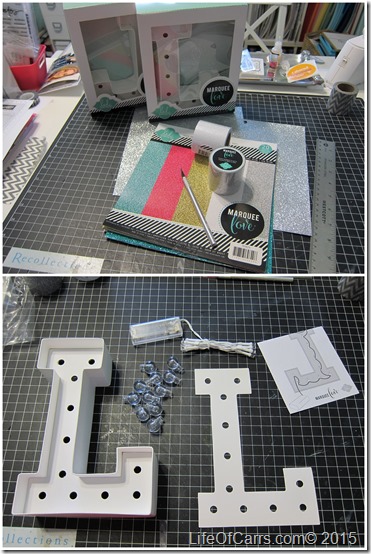
Supplies and tools needed:
-
Heidi Swapp Marquee Love Letters, (they can be found at Michaels, at scrapbook.com and amazon.com. If you live in the east valley Phoenix area, you can pick up your order and save on shipping and the letters and other supplies are currently on sale.
-
Scrapbook paper - I used the Heidi Swapp Marquee Love Glitter Paper. Anyone that knows me well, would know I didn’t really need to buy the paper but I bought it anyway so I didn’t have to go through my stash and find the perfect paper.
-
2” washi tape or glitter tape – I used a chevron washi tape I already had (probably from Studio Calico) and Heidi Swapp Marquee Love Glitter Tape
-
pencil
-
adhesive
-
ruler
-
removable tape (or washi) to hold the letter in place for cutting
The letter kit comes with the letter, letter template, light bulbs and an LED light strand. They sell extra lights in other colors and light strands, you don’t need them unless you want to change the light color. The light bulbs are plastic so you probably won’t break them.
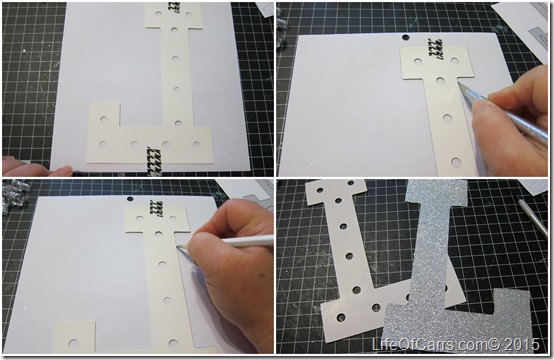
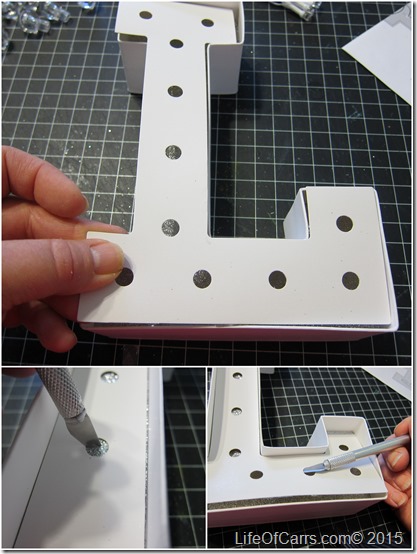
Tape your letter to the backside of the paper. Make sure the letter template is flipped the opposite way, so the letter is cut the right way on the side of the paper you are using. If you are using a patterned paper you will want to make sure that your letter is lined up properly (or you can cut it on the front side - glitter paper can cut weird or tear due to the texture so I wanted to cut from the back where it was smooth.
I traced the letter first with a pencil, in case I missed a spot when I cut or if the letter moved I could realign it easily. Trace around the letter with the craft knife and remove the excess paper.
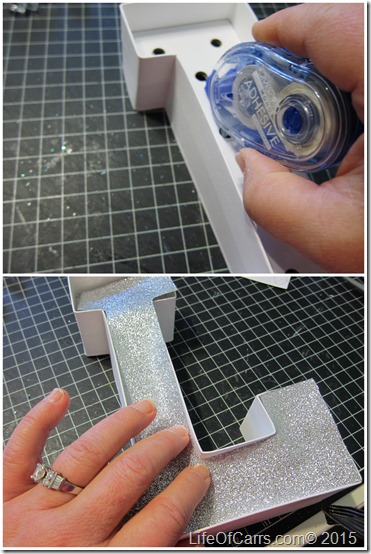
Dry fit the cut letter into the marquee letter before you apply the adhesive. It will give you an idea how the letter should be laid so that you can lay it down smoothly. Remove the letter and then apply the adhesive. I would recommend using an adhesive that gives you a few minutes to move the paper if needed. My glue gun is permanent immediately, so I knew I did not want to use that since the paper was a lighter weight. I used Tombow Adhesive, it is permanent adhesive, but it gives you a little time before it becomes permanent. Lightly press the paper letter into the cardboard letter smoothing out any bubbles.
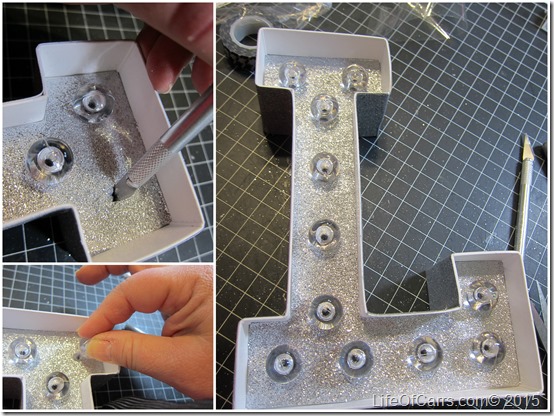
Lay the letter template on top of the cardboard letter (on top of the paper). Use your craft knife to poke holes where the light bulbs will be inserted later. I did 2 cuts in each hole, in an X shape. Use the craft knife to lift the letter template out of the letter.
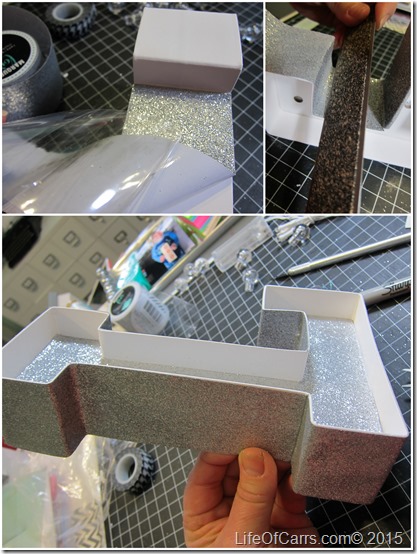
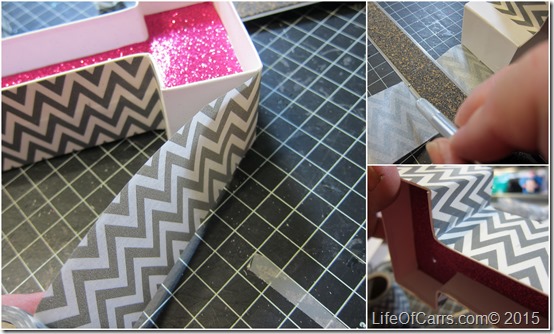
Next use your washi or tape and line it up in an underside area or corner and both edges and SLOWLY adhere the tape. This is where I tell you I prefered to use the washi tape because it is easier to work with as you are able to lift it up and re-align as you move around the letter. The glitter tape is not moveable once you press it down. I needed to cut it at a few of the inside corners because the marquee letter material is not perfect (and I am not either). I recommend using a ruler along the letter to smooth it out as you go and in the inside corners of the letters to crease the tape in the corner for good adherence.
Now you are ready for adding your bulbs. Find the holes that you previously cut and insert the light bulbs into the holes. They fit snuggly, not difficult at all to place, and it looks to me like they should stay in well over time.
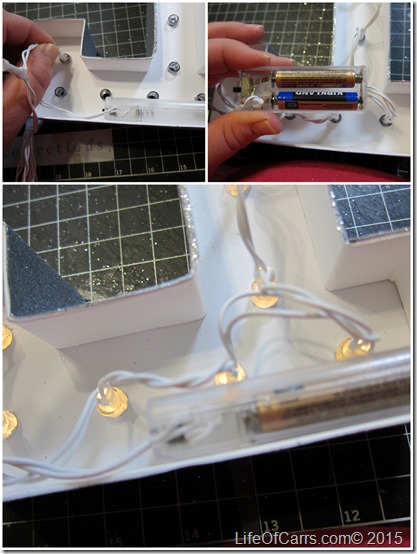
Flip your letter over and figure out where you want the battery box to sit at the bottom of the letter. Insert your batteries (2 AAA batteries) and place your box inside the letter where you can reach the on/off button. String the lights keeping the cords inside the back of the letter.
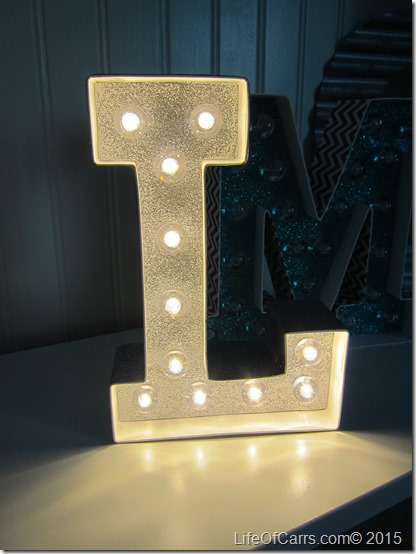
Here is another letter I did using washi tape. It took about 10 minutes to do the glitter tape on the “L” letter and less than 5 to use washi tape on the “J” letter. I also used the washi tape on the “M” letter, that one took a little longer being my first attempt and also the inside of the letter was harder to get lined up. When finishing up the tape, it is best to be on the bottom or on the underside of part of the letter. I measured out what I needed on the last section and did a straight cut on the tape and then had a small overlap that isn’t noticeable on the underside of the J.
Easy peasy! And so fun!
It’s a coincidence that the L & J for the teachers also happen to be my initials with my maiden name. Now I may go back and get more letters to make another L and J for me.
It was a fun easy project. Perfect for teacher gifts and mother’s day. And the just make me happy! You can also paint these (although I would wonder how it would hold up without warping since it is just made out of cardboard). You could use glitter or any other type of medium you could imagine.
Now if I could just find more of that washi tape.
